Quick answer
Scan each page in even light, inspect the crop and scan quality, add your signature only in the intended field, review the completed document, verify the fax number, send, and retain confirmation.
An iPhone can replace several pieces of office equipment for a simple document workflow: its camera captures the paper, an editor adds a signature or mark, and a fax app transmits the finished pages. The convenience is real, but the final review matters. A beautifully signed document is still unusable if the scan cut off a page, the signature covers text, or the fax went to the wrong number.
Use the following process when you need to turn paper into a signed outgoing fax with FaxPrime.
Prepare the paper and camera
Start with the cleanest original available. Remove staples if they prevent pages from lying flat, unfold creases, and place one sheet at a time on a surface that contrasts with the paper. A white page is easier for the camera to detect on a dark, non-reflective table than on another white sheet.
Use bright, even light from both sides when possible. Avoid direct overhead glare on glossy paper. Clean the iPhone camera lens with a suitable soft cloth, then hold the phone parallel to the page. If the top of the phone is much closer to the paper than the bottom, text and signature fields may be distorted.
Before scanning, check whether the document has content on both sides. Put the pages into a known order so you do not accidentally skip or reverse one.
Scan every page for readable quality
Start a new fax in FaxPrime and choose the scanning workflow. Keep all four corners visible until the app detects or captures the page. Review the automatic crop instead of accepting it blindly: printed page numbers, signature lines, checkboxes, and marginal instructions can sit very close to an edge.
Good scan quality means the information needed by the recipient remains readable. It does not require making the page look artificially dramatic. Excessive contrast can erase light handwriting or turn a shaded form into a large black area.
After each capture, inspect these points:
- Text is sharp at normal reading zoom.
- All four edges and every required field are included.
- The page is upright, not skewed or sideways.
- There is no finger, shadow, glare, or background object over the page.
- Light pencil, stamps, initials, and checkmarks remain visible.
- The page number matches its position in the document.
Rescan immediately when a problem appears. Correcting a capture is easier before signatures and additional pages are added.
Put the scanned pages in order
Review the thumbnail sequence after scanning. Put the primary form or letter first unless a cover sheet is required. Place exhibits, identification, or supporting pages after the document they support.
Remove duplicate captures and unintended blank pages. Keep an intentional blank page only when the recipient’s process requires the original pagination. If you are combining a paper scan with a digital attachment, verify the boundary: page 3 of the scan should not appear after page 8 of an imported PDF.
State the total page count on the cover sheet. That gives the recipient a simple way to notice when a page did not arrive.
Add your signature carefully
Open the page that contains the signature field and use the available editing or signature tool. Create or select your signature only after you confirm that you are on the final version of the correct document.
Place the signature inside its intended box or line. Resize it proportionally so it looks natural and does not cover printed terms, a date field, or another person’s signature. Use a dark mark with enough contrast to survive fax reproduction.
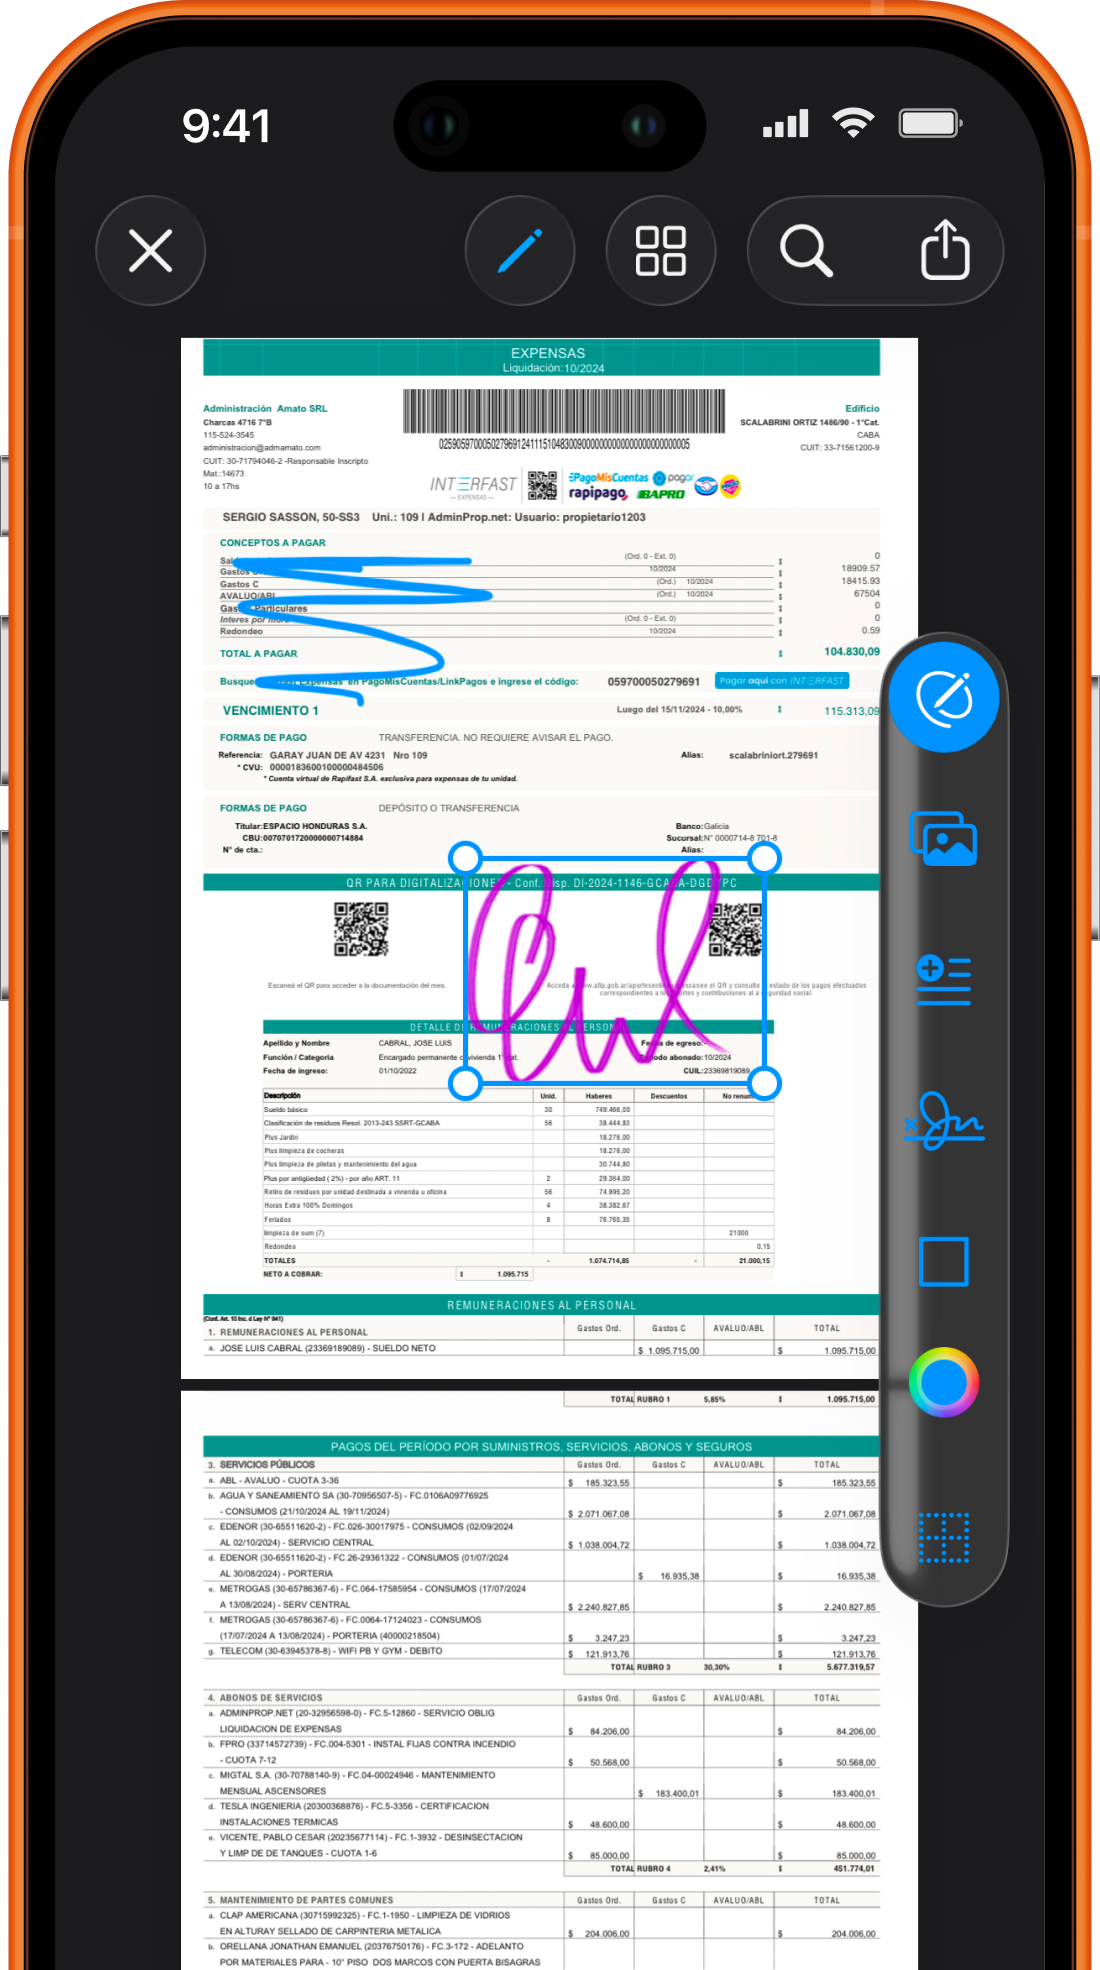
Add the date, initials, or other required fields separately when the form calls for them. A signature image does not automatically complete adjacent fields. Do not sign for another person or alter a document unless you have authority to do so.
Electronic and reproduced signatures are not accepted for every transaction. The recipient, law, or governing process may require a particular signature method, identity verification, witness, notarization, or original paper. Confirm the requirement before relying on an in-app signature for high-stakes documents.
Perform a final review before sending
The final review should cover the whole fax, not just the signed page. Open every page at readable size and use this sequence:
- Confirm the document title and version.
- Check the page order and total count.
- Inspect the crop, orientation, and scan quality.
- Verify every required field, signature, initial, and date.
- Make sure edits do not hide original text.
- Confirm that no unrelated page is attached.
- Review the cover page and recipient details.
This is also the moment to decide whether the signed document should be saved as a separate final copy. Keep the unsigned original when you may need to revise it later, and name the signed version so it cannot be confused with a draft.
Enter the fax number and send
Use a fax number supplied by the recipient or an authoritative source. Select the correct country, then compare the area code and remaining digits one by one. Confirm the department when an organization publishes multiple numbers.
Add a cover page if it helps route the fax. Include a concise subject, page count, sender contact, and intended recipient. A confidential label is useful handling information but does not prevent the document from being seen at a shared device. You can adapt one of the fax cover sheet templates when the recipient has not provided its own.
Send only after the document and number pass the review. Maintain a stable internet connection while the upload starts. If the app shows the transmission as pending or sending, allow it to reach a final state before deciding what to do next.
Save the confirmation and signed copy
A successful tap is not the final record. Wait for the fax status to report delivery or failure. For important documents, keep the confirmation with the exact signed version you transmitted. Useful details include the destination fax number, date and time, page count, and final status.
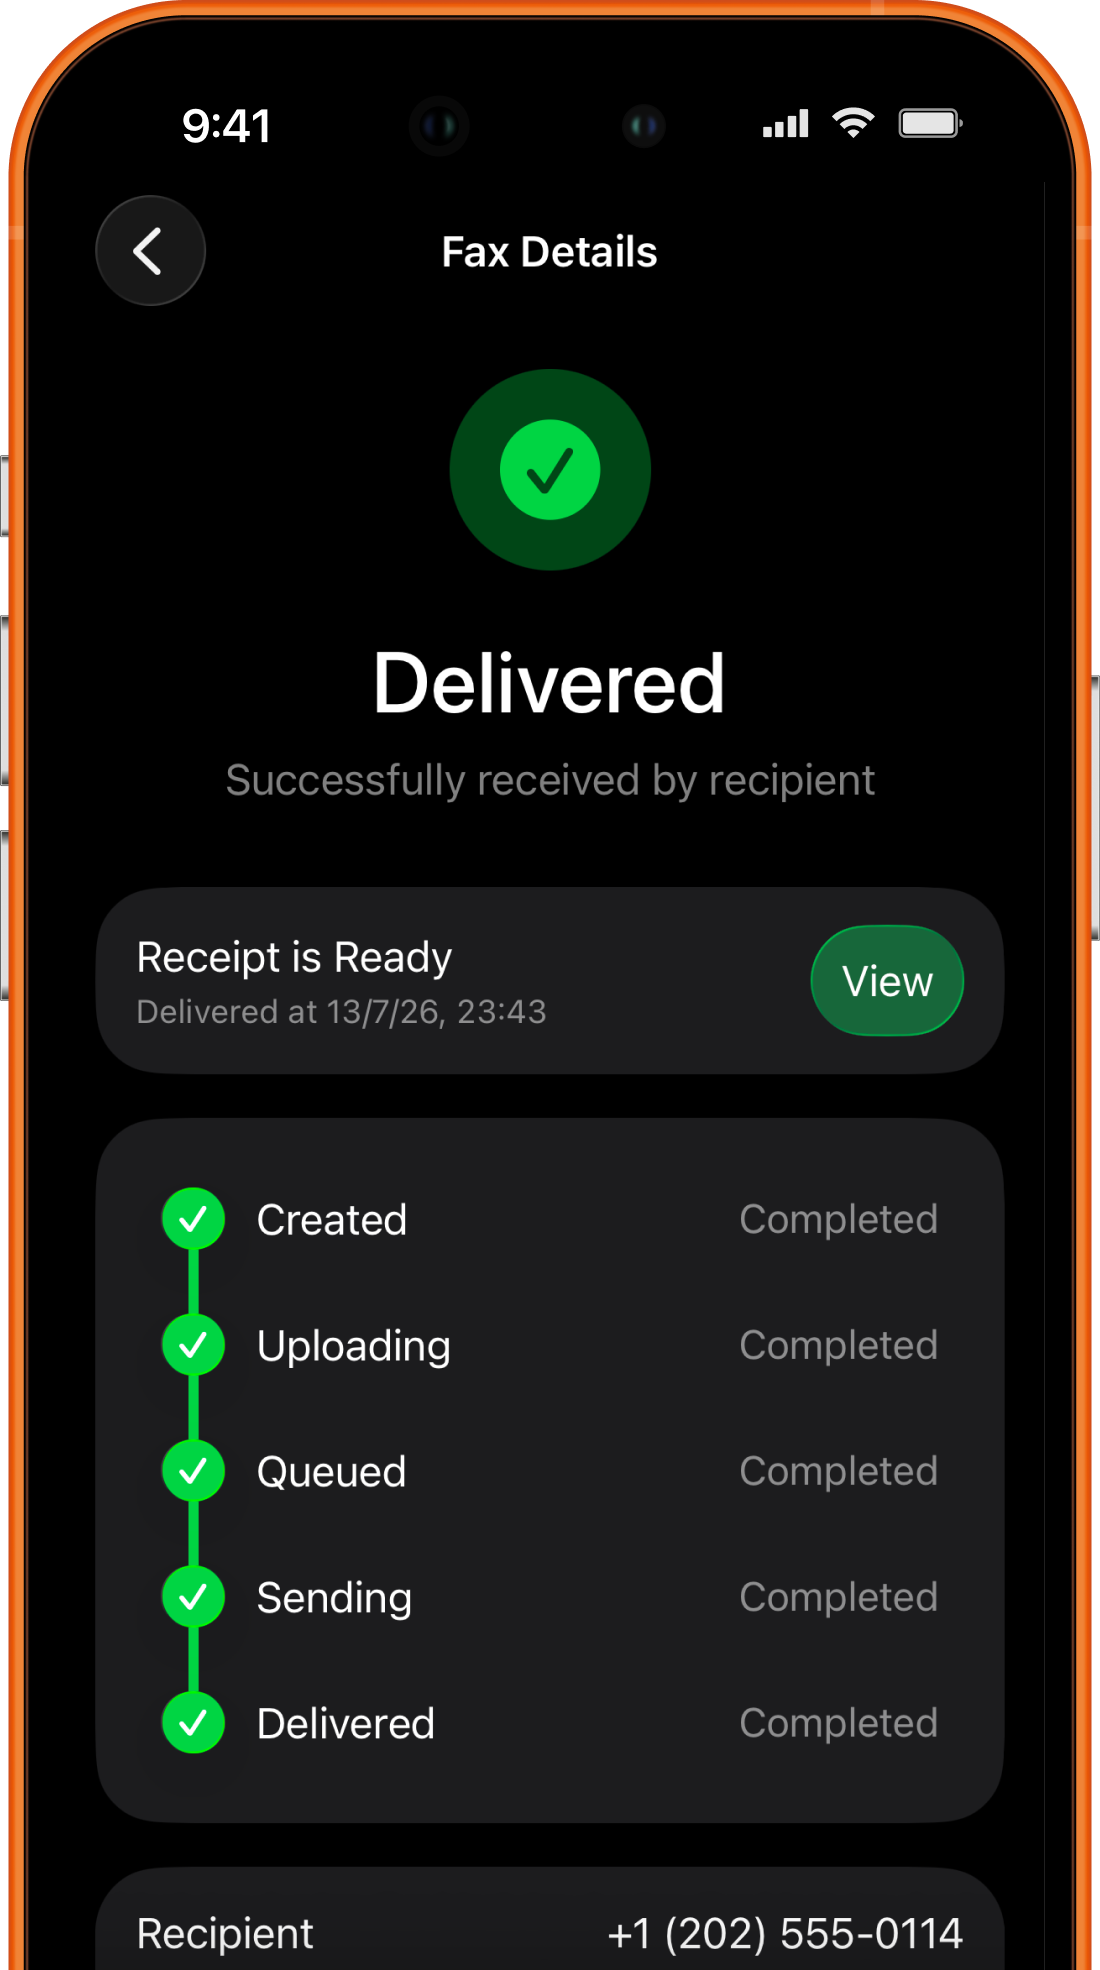
Delivery to the fax endpoint does not necessarily mean the intended person reviewed or accepted the form. When a deadline, filing, payment, benefit, or legal right depends on the document, follow the recipient’s procedure for confirming that it was matched to the correct record.
Protect the retained copy. If you export it to Files, cloud storage, or email, each exported version becomes another copy with its own access and retention risks.
Fix common scanning and signing mistakes
The page edges are missing. Return to the original paper and rescan with more space around all four sides. Do not try to recreate cropped text manually.
The scan is gray or shadowed. Move to brighter, diffuse light and keep the phone parallel to the paper. Use a plain background and avoid placing your body between the light and page.
The signature is blurry. Recreate it at a suitable size or use a clearer source. Inspect the signature after resizing; enlarging a tiny raster image can make it soft.
The signature covers text. Move or reduce it so the signature stays inside the intended field. If the editor has flattened the change and it cannot be adjusted, return to the unedited page and repeat the signature step.
A required field was missed. Correct the document before faxing when possible. If the fax was already delivered, contact the recipient for instructions rather than silently sending a different version that may create duplicate records.
The completed fax failed. Keep the signed file, verify the destination number, and review the failure status. You should not need to rescan and sign the paper simply because the receiving line was busy.
Frequently asked questions
Can I scan and fax more than one page?
Yes. Scan each page, arrange the sequence, remove duplicates, and inspect all pages before sending. Put the total number of pages on the cover sheet so the recipient can verify completeness.
Can I add a signature to an existing PDF instead?
Yes, when the editor supports the document. Import the PDF, place the signature on the intended page, and review the entire result. See how to fax a PDF from an iPhone for import and page-order checks.
Is a scanned signature legally valid?
Acceptance depends on the document, jurisdiction, parties, and required process. Some workflows accept a reproduced or electronic signature; others require a specialized signature, witness, notarization, identity check, or original. Ask the recipient or a qualified professional when the consequence matters.
Should I keep the paper original?
Follow the relevant retention requirement. Some organizations need the original paper even after accepting a fax, while others treat the transmitted copy as sufficient. When uncertain, keep the original securely until the recipient confirms the process is complete.
Can I edit a document after signing it?
Technically possible edits may change what the signature represents. If substantive content changes, return to the unsigned source, make the authorized correction, and sign the final version again. Keep versions clearly separated.